


PDF Document Signing with PDF Signer Server
PDF Signer Server is a software that allows you to sign a PDF document or to sign several documents automatically with a cryptographic token. This software also has a function to save the PIN code of your token, which therefore makes it possible to automatically sign documents without having to systematically enter the PIN code.
The software is only available for Windows and can be tested for free for 30 days.
To download the software, click on this link:PDF Signer Server
To buy a license, contact us: marianne.bonjour@tbs-internet.co.uk
Sign a document
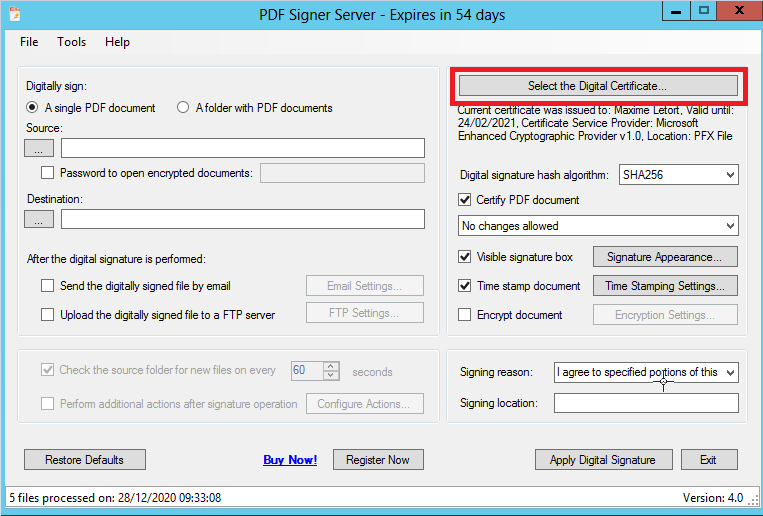
Once the software has been launched, you must first select the certificate that will be used to sign the document. To do this, click on Select the Digital Certificate in the upper right part of the window
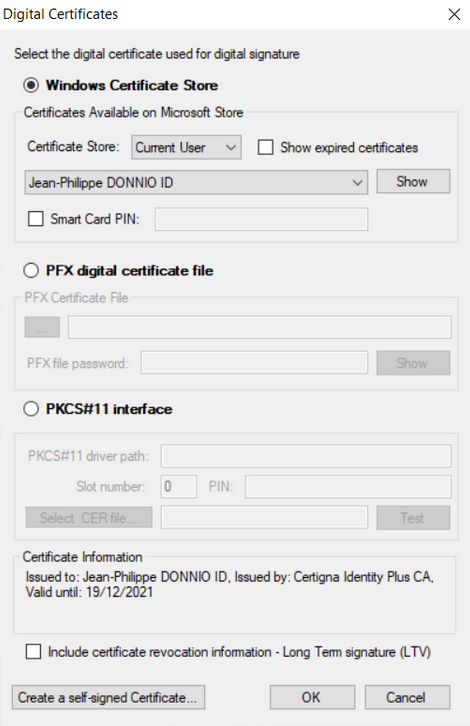
In this window, you can choose the origin of the certificate. A certificate on token will be present in the Windows certificate store. You can therefore choose the first option Windows Certificate Store and select your certificate.
Here is an example with a certificate on token from the Certigna authority:
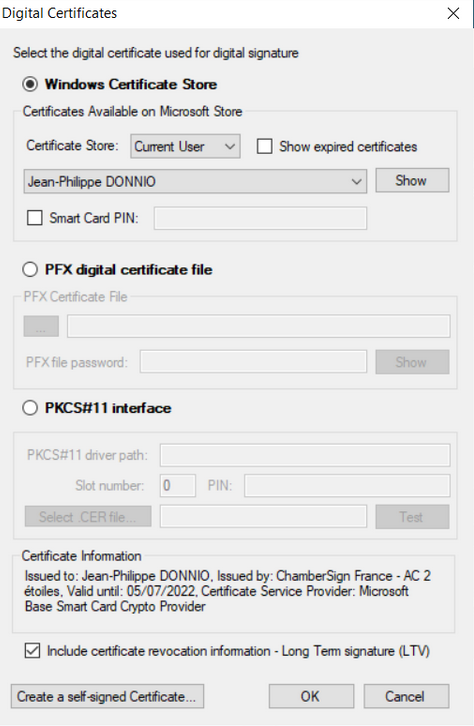
Another example with a token certificate from ChamberSign:
Once the certificate has been chosen, click onOK. Then select A single PDF document. Enter the path where the document to sign is located. If the save destination of the signed document differs from the original location, this must also be indicated.
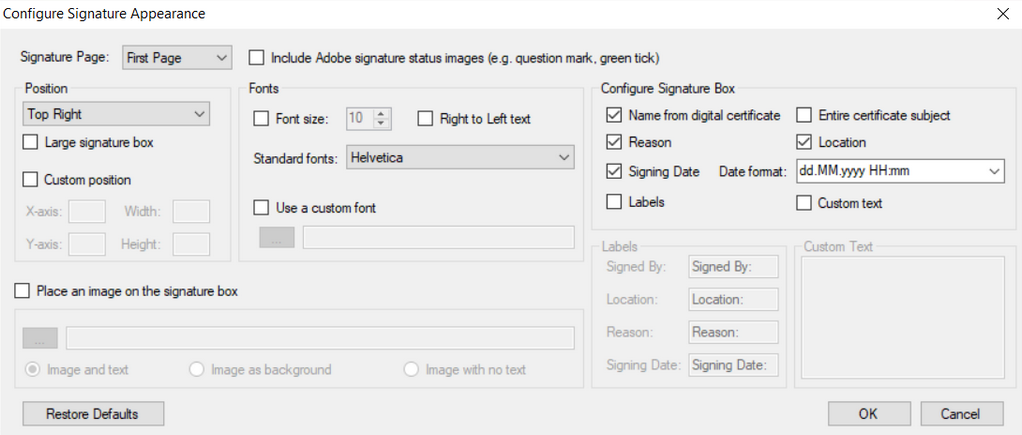
Signature appareance
You can decide whether your electronic signature is visible or not in the document. To do this, check the "Visible signature box" box.
By clicking on the button Signature Appareance, you can modify the appearance of the signature: choose its position, font and size, a personalized background.
If you wish, you can scan your own signature and add it as an image.
You can also choose what should appear on the signature: date, location, name on the certificate, ...
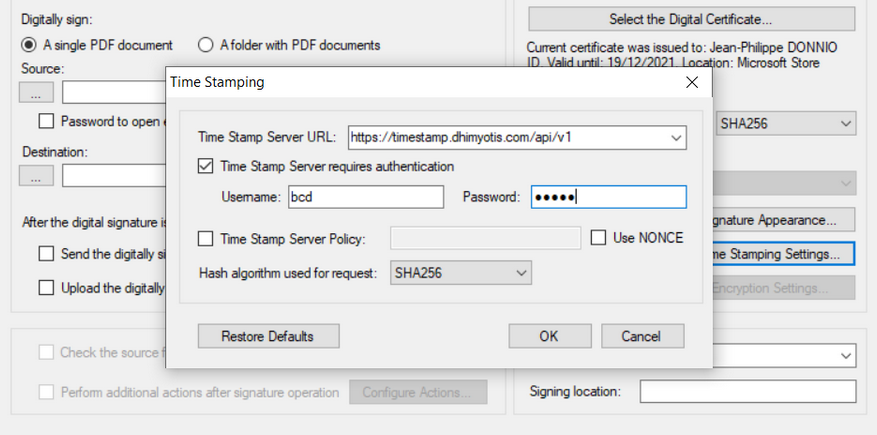
Add a timestamp
To add a timestamp, check the "Time stamp document" box and click on Time Stamping Settings. This will allow you to choose the Time Stamp server as well as to inform if necessary the identifiers to connect to the server.
f you have specific needs in terms of time stamping, we offer the Certigna certificate stamp Qualified eIDAS timestamp
Once you have made your choices, click on Apply Digital Signature. A confirmation message will then appear.
Sign multiple documents
PDF Signer Server gives you the possibility to sign several documents in a semi-automatic way.
The documents to be signed must all be located in the same folder. Select optionA folder with PDF documents
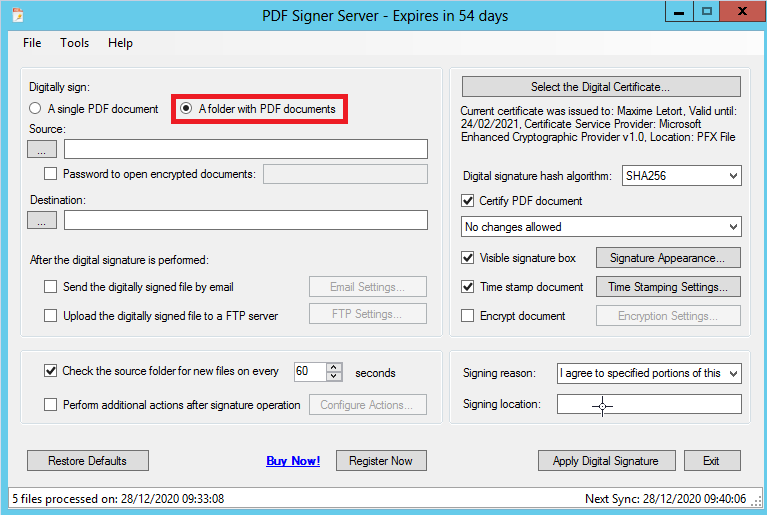
Choose the location of the source folder and the destination folder and click Apply Digital Signature
Automatic signature verification
A very handy feature of the software is the automatic signing of PDFs through monitoring a folder that you choose.
When you select the option A folder with PDF documents, you can tick the box
"Check the source folder for new files on every ..."
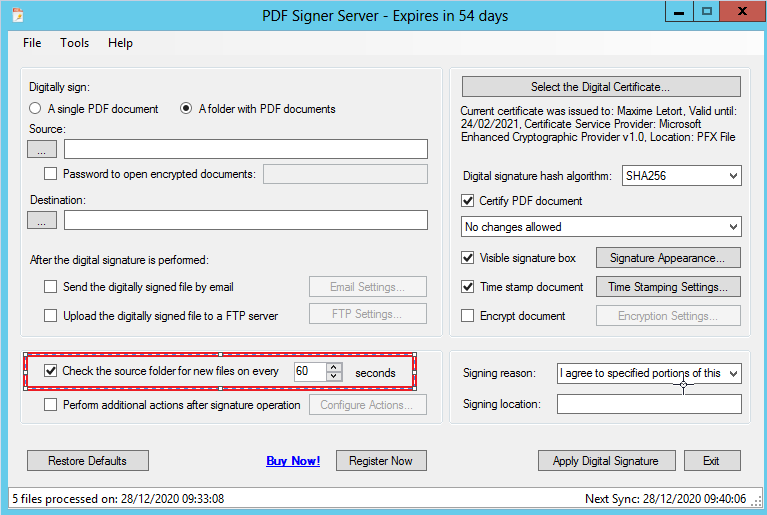
This option tells the software to check every X seconds if a new file has been added to the previously chosen source folder. If a new document is detected, then the software will automatically sign it. Attention, for this to work, the software must remain open (you are free to put it in the background).